How to install a Wintesla Flashfile:
1. Double click on the icon of the Flashfile
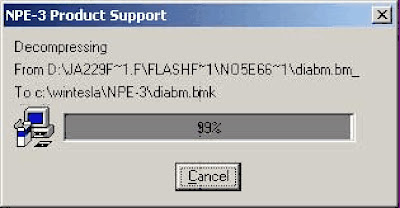
2. Then the installation of the Flashfiles starts.
3. Click “Install”, after this the program ask you where to put the files in. The destination
folder should always be: “c:\wintesla”. Then press the “OK” Button.
4. After this the program starts to copy the files (It will take some minutes)
5. After copying the files you should get this Message:
Press the “OK” button. Now the Flashfiles are successfully installed.
How to Flash a DCT-3 Phone:
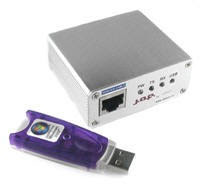
1. Connect your Phone to the box, and start the J.A.F software:
(Double Click on this Symbol on the Desktop)
2. Select the DCT-3 Tab in the J.A.F Software and Press the “Info” Button
After this in the status Box should be a new message like this one:
In this window you can see the current Firmware of the Phone and the IMEI and the
Security Code. If there is no Security code displayed, is the code 12345.

3. Before you can flash the Phone you must select the right flashfiles. The MCU is the
file where the whole software is saved. The PPM is only the language file. So click
“Flash MCU” then a new Window appear. Select the MCU file of the phone and then
press “Open”
4. After pressing OK a second windows appear for the PPM file. Select the Language
File you like and then press also the “Open” button.
5. Now the files for flashing are selected. Just Press the “Flash” Button to start flashing.
If you want to flash the Phone Manual (recommend for dead Phones) tick the
“Manual Flash” box.
Important: Never disconnect a Phone during the flashing procedure. And wait until
there is the Message: Done!
After this the phone is up to date.
How to Unlock a DCT-3 Phone:
1. Connect the Phone to the Box
2. Select “Init Simlock” then Press the “Unlock” Button.
If you want to lock the Phone to only one Network tick the “Lock to Network” Button and
enter the Operator Code and then press Unlock.
How to make a “Factory Reset”:
Tick the “Factory Settings” button and then Press the “Service” button. Wait until the
message ”Done!” appear in the “Status and Results” Box.
How to flash a virgin EEPROM:
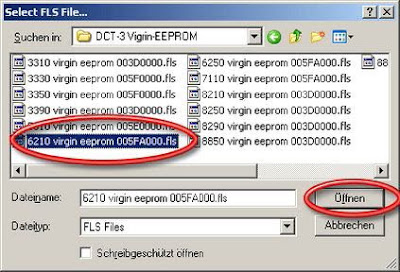
1. Press the “Write FLS” Button, and select your Phone Model and press “Select”
2. Select the EEPROM and press “Open”
3. Then the J.A.F software will ask you for the start address of the EEPROM. Enter the
address and then press “OK”
4. This is a Log of the flash procedure:
BOX OK!
JAF DCT4/BB5 LOADERS DIR: C:\Programme\Nokia\Phoenix\Flash\
JAF USB LOADERS DIR: C:\Programme\Nokia\Phoenix\FlashUSB\
JAF DCT3/DCTL LOADERS DIR: C:\Programme\Nokia\Phoenix\Flash3\
Booting phone...
BOOT file: C:\Programme\Nokia\Phoenix\Flash3\dct3bt2.tia
Boot size is 0x03BC
0x61,0x07
Boot is ready...
Operation took 0 minutes 3 seconds...
Flash ID is 0x96888900
ALIAS ID: 96888900
BOOT file: C:\Programme\Nokia\Phoenix\Flash3\I28F160.TIA
Loader size is 0x17CC; Loader chk: 5fb7
Loader is ready...
Operation took 0 minutes 1 seconds...
Erasing...
Erasing area: 005F0000 - 00600000...
Operation took 0 minutes 1 seconds...
Writing PMM...
Operation took 0 minutes 1 seconds...
Terminate Flash Session...
Now the new EEPROM is uploaded!
NOTE: In the EEPROM file are all setting of the Phone saved. If you have a dead phone
and it is still not working after flashing, upload a new EEPROM, and then it should work
Sunday, November 15, 2009
Nokia DCT- 3 Flashing Manual with JAF
Posted by zuhri at 1:58 AM
Subscribe to:
Post Comments (Atom)

0 comments:
Post a Comment